Showing posts with label Youtube. Show all posts

Tuesday, January 30, 2024

Scrapbooking Live Friday Night Replay

 Happy Tuesday!

I hope that you all are well. I am enjoying the warmer weather here, as it was much too cold for my liking last week while I was out of town for work in North Carolina. Once I got back home, I literally just wanted to soak up all the sun and heat that I could. 

I had an opportunity over the weekend to record my Scrapbooking Live Friday night. If you missed it, you can watch the replay on Youtube below:

Part 1


Part 2


The end result layout was super cute, and will work great with some snow pictures I have from a few years back, that I was looking at last week. 


Saturday, January 20, 2024

Create, Organize and Plan

Create, Organize and Plan 
with the "Just One More Chapter" Collection from Tula Xii


 See how easy it is to design and create your personal planner...


Shop for these accessories and more on my Online Store!


Sunday, December 3, 2023

Who Has Crafting Space Ideas?

Who Has Crafting Space Ideas?

 How many times have you scrolled through pictures of others crafters scrapbooking rooms, looking for idea how how to organize? I know I have spent hours over the years. From Pinterest posts to blog posts, I am always looking for inspiration and ideas on how I can improve my crafting room space. 


Recently a crafter asked me about how I store my Kiwi Lane Club Kits and Paper. So I thought I would share my current set up. This seems to be working for me so far. 


I would love to see how you have your space set up. If you have a video link, please comment it below!

Thursday, January 13, 2022

12 x 12 Scrapbooking Layouts With Base Pages

 12 x 12 Scrapbooking Layouts With Base Pages


Just a quick share of some of my most recent base pages. I used a variety of Scrapbooking supplies for these.

Some papers are from Kiwi Lane, others are from various brands. These easy base page patterns can be used with any awesome brand of scrapbooking supplies.


** Please note my son ran into the room at the very end of the video to come ask me a question**


Have you tried base pages?

What is your go-to design?

Comment below, I would love to hear your experiences.

Friday, February 22, 2019

Workspace Wonder Week!

Happy Friday! 
We have officially started...

WORKSPACE WONDER™ WEEK

Save 35% on Workspace Wonder™

Celebrate our 35-year milestone with a week of savings on the incredible Workspace Wonder™ line! 
This customizable system allows you to stack individual components into a configuration that is just right for your craft space. 
These savings are only available through 11:59 pm (MST) on Thursday, February 28, while supplies last.
Order on my website ~~here~~!
Here is a quick video to show you my personal set up in my Scrapbooking room:

Please let me know if you have any questions at all!

Monday, January 14, 2019

Quick and Easy "Thanks" Card Using the January 2019 Stamp of the Month Stamp Set "Card Captions "

A Quick and Easy Card Using the January 2019 Stamp of the Month Set, "Card Captions".


This card features a color combination of Kraft, Ballerina and Mint.


The card base is Kraft cardstock.
Then a layer of Mint cardstock.
Then a layer of Ballerina cardstock.

Here is a close-up of the sentiment "Thanks", stamped on White Daisy cardstock from the 


Here is a close-up of the Ballerina layer that has been stamped with the small flower from the January Stamp of the Month set "Card Captions"


All of the layers were distressed in Pewter Ink, to include the inside of the card.


The "Card Captions" set is only $5 when you purchase an order of $50 or more from my 


This set has 26 stamps included in the set. 
A Great Value for only $5!


Here is the process video I created for the making the card:


(Please note the White cardstock in the video is White Daisy, not Whisper White).

Thank you for stopping by today, please let me know if you have any questions at all.

Saturday, December 29, 2018

Have You Checked Out My Youtube Channel?

In case you are new to Close to my Heart, products, I have some awesome youtube videos that showcase our products and their uses...


Be sure to check back regularly, I am always adding new videos. 
Would you like to see something specific, let me know, and I will create a video just for you!


Sunday, July 8, 2018

Embellishment Organization with Close to my Heart Products


Just a quick video to show how I organize my embellishments in my craft studio.


To purchase this size organizer, please visit my website.

To see all of our organizational products please visit my website.


Thursday, May 3, 2018

Major Clearance Items Just Added!

Run, don't wait, and check out our newly added clearance items on my Close to my Heart website! So many items under $3. Everything from die cut sets with stamps as low as $5 to embellishments for less than $2. You do not want to miss this!

Here are a few screen shots of items currently available until they sell out!


And don't forget when you spend $50 or more, you can get the "Stamp Of The Month" for only $5! So make sure you add that onto your order as well!

Isn't it adorable?

Perfect for your summer invites, cards and scrapbooking layouts! 
Where are all of those Lemonade stand photos you have? This would be awesome for those!


Here is a quick video, to show you all the great options right now!


Wednesday, July 19, 2017

A Quick Birthday Card...


Had a chance to play for a little bit with some new goodies, that arrived today. 
Come join me, as I make a quick birthday card. 

Part 1:


Part 2:

Hope you find these useful. Please let me know if you have any questions at all. 
To purchase the paper pack, I used, click here.

Saturday, July 8, 2017

Pocket Scrapbooking Organization with Close To My Heart Products


I hope this video was helpful in helping you organize your supplies.
The more organized you are, the more likely you are to sit down and scrapbook.
If you are interested in purchasing your own medium organizer, click here, or contact me to order. 

Tuesday, July 4, 2017

A few older tutorial videos, but helpful for many...

Masking The Basics


Coloring with Copics Part 1


Coloring with Copics Part 2


Coloring with Copics Part 3


Slide-Out Panel Card for a Splitcoaststampers Swap

Hope you are enjoying this beautiful summer weather, especially here in the South. 
This week, I signed up for a few swaps, and decided to enter a few challenges. 
What better way to get the job done? Combine the tasks! 

So here is a tutorial on how I created my Slide-Out Panel Card. I'm sure there are other ways to create these, but this was the easiest for me. I needed to make 8 cards focusing on the color green for the Rainbow Swap on Splitcoaststampers. Typically unless it is a requirement, I try to make the cards all sightly different. So not all 8 follow this design. 

Shall we begin?

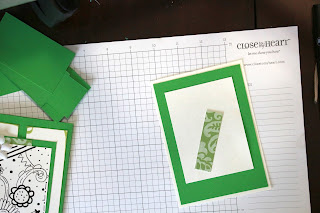
If you follow me on my Youtube Channel, you may have seen a green card I created using hand drawn doodling. The accent piece on the front of this card, was made using that technique. The doodling on white cardstock is a great way to create your own One-Sheet-Wonder. I simply cut the doodling, then matted that piece onto a piece of green cardstock. That rectangle was then layered onto a piece of patterned paper. Total it measured about 3 3/4 inches tall and about 3 inches wide. 


After adhering each piece, I added a Rhinestone Brad and a Fabric Flower for my embellishments.


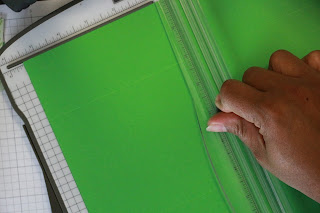
Now for the card base, I started off with my 8 1/2 inches x 11 inches cardstock in the portrait position, scoring my green cardstock at 2 1/8 inches, flip to the opposite side and score again at 2 1/8 inches. I then turn the cardstock in the landscape position and cut at 5 1/2 inches. If you have ever created a Gatefold Card, this is pretty much the same measurements.


I now have two card bases, just as if I was creating a traditional 4 1/4 inch x 5 1/2 inch card. This completed card will measure roughly the same as well. Fold on the score lines.


Next I created the front panels for the card. These are cut at about 1 3/4 inches wide by 4 inches tall. I took a marker and adding some distressing ink around the edges just for a little character. A sponge would have been nice to use as well. 


I just used regular adhesive to mount the panels to the front of the card. 


Once I mounted the panels I then mounted the accent piece for the front. Normally with a Gatefold card you just add adhesive to one side of the backside of the accent piece. With this, I added it to both sides, so that the accent piece "closed" the card. 

Next I needed to create the inside Panel, for the sentiment and space to write. Now this piece I had to play with a bit to get the measurements close to the front of the card, yet still have space for the pull tab without making it too big to fit in a regular envelope. You may have to play with this as well to ensure a fit or make your own envelope. 

 It pretty much is three layers of cardstock, two white and one green. The larger white is about 4 inches x 5 1/4 inches. The green is just slightly smaller, and the top white piece, you could make just about any size that fits within the other two. The little pull tab is about 1/2 inch-3/4 inch wide and about 2 1/4 inches long. Really this could be just about any size. Just make sure when you adhere it, the part sticking out isn't so far that you can't get the entire card into an envelope.


So far, so good, now we just need the sentiment. 


I chose to use Memento Tuxedo Black Ink. The stamp is the "Thinking of you" stamp from the Close to my Heart, Petite Perks set "Just for You". This is a stamp set, I usually give all of my hostesses free and customers that shop with me regularly. It's a cute little set with 4 different greetings.


Once you finish stamping the sentiment on the panel. Simply slide it into the case we created. 

Here is the completed card. 


I hope this tutorial was helpful, please let me know if you have any questions at all. 

This card was created to also meet the guidelines for the following challenges: